
Everything You Need to Know About Jojo Tank Installation
Everything You Need to Know About Jojo Tank Installation
Research Your Needs and Choose the Best Tank For You.
Learn How to Install the Base Plate, Piping, and Accessories.Plan a Suitable Site for Your Jojo Tank.
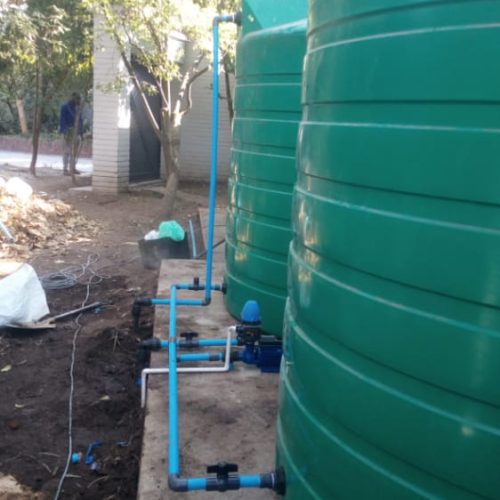
The next step in Jojo tank installation involves laying the base plate, piping, and accessories. First you will want to lay down pieces of gravel on the ground around your chosen area for the tank. Lay a level base plate over the gravel, making sure it is level for easy pipe work. Now add the piping before joining up all your accessory parts. These include T-pieces, bend pieces and caps depending on whether you will be connecting multiple tanks together or not. Be sure to read the instructions carefully before joining any pipes to ensure that your Jojo tank installation is successful!
Perform Regular Maintenance Checks on Your Jojo Tank.
After successfully installing your Jojo tank, you will want to make sure it is receiving regular maintenance. Part of the maintenance involves checking for any signs of leaking such as wet spots around the tank or in the piping. It’s also a good idea to do visual checks on pipes and parts to look for any cracks or damage that could be causing leaks. Additionally, it’s important to ensure that your Jojo tank is always supported and level so that contents are evenly distributed throughout.
Watch Out for Leaks or Structural Damage to your Jojo Tank.
Experts At Work
Related Posts
- A Comprehensive Guide To Maintenance Of Existing Irrigation Sprinklers
- Everything You Need to Know About Jojo Tank Installation
- 9 Expert Tips for Installing an Irrigation System
- The Ultimate Guide to Irrigation Repairs
- The Essential Guide to Borehole Repairs
- How to Diagnose and Fix Common Borehole Repair Issues
- 7 Top Tips for Effective Borehole Repairs
- Where to Find Quality Services for Borehole Repairs
- How to Find the Cost of Borehole Repairs in Your Area

